install-vuos: Difference between revisions
| (5 intermediate revisions by the same user not shown) | |||
| Line 1: | Line 1: | ||
= Re | __TOC__ | ||
Vivid Unit | |||
'''Remarks:''' this tutorial is for (re)installing Vivid Unit OS (Debian 12) into Vivid Unit device. If you want to install the old system (Debian 11), please read [[install-os|this page]] instead. | |||
= (Re)install Vivid Unit OS = | |||
Starting from April 7th, 2026, the Vivid Unit in UUGear's inventory have Vivid Unit OS (Debian 12 with XFCE desktop enviroment) pre-installed in the eMMC. | |||
Usually you do not need to (re)install operating system by yourself. However if: | |||
* Your Vivid Unit has old system (Debian 11) and you want new system, or | |||
* The system on your Vivid Unit corrupts, or | |||
* You want to install a different operating system (if available) | |||
Then you may follow this instructions. | |||
You may download the OS image from [[download-system-image|this page]]. The downloaded image is an img.xz file, and you need to extract it to get the .img file, which can be flashed into Vivid Unit. | You may download the OS image from [[download-system-image|this page]]. The downloaded image is an img.xz file, and you need to extract it to get the .img file, which can be flashed into Vivid Unit. | ||
| Line 14: | Line 26: | ||
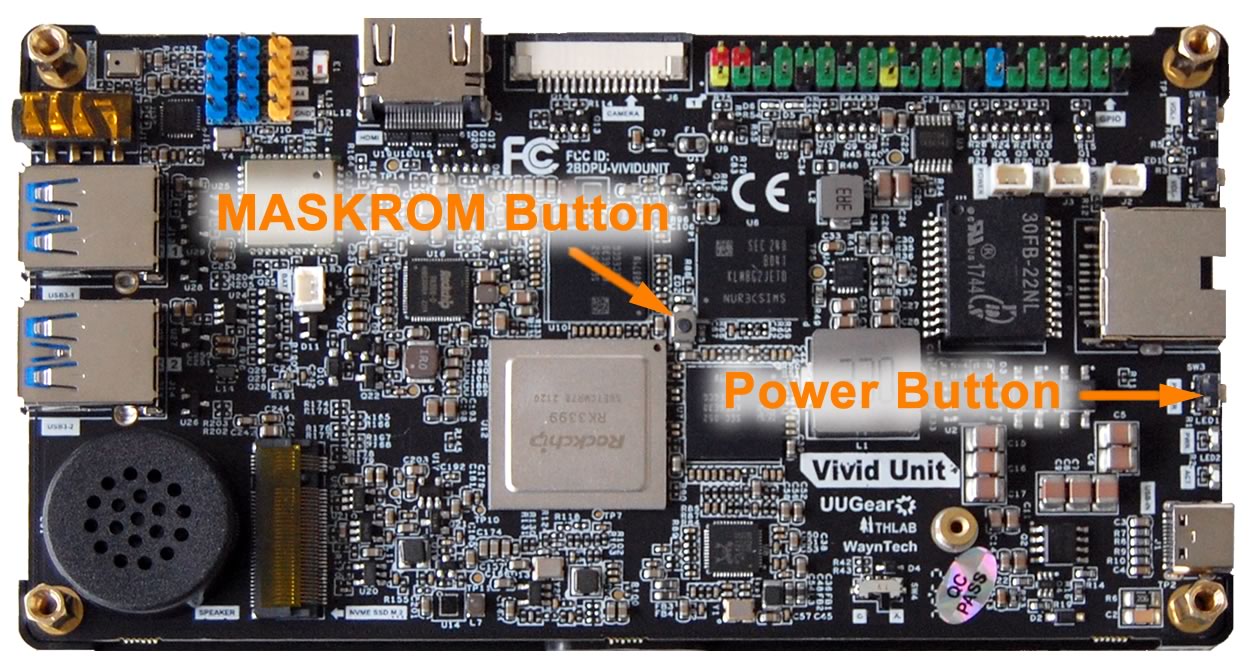
Connect your Vivid Unit to your computer via an USB type-C cable. Press and hold the small MASKROM button in the middle of Vivid Unit's circuit board (do not release it) and then press the power button (also do not release it) for about 5 seconds. After releasing both buttons you should see the MASKROM device is detected by RKDevTool. If it doesn't show up, please repeat this step. | Connect your Vivid Unit to your computer via an USB type-C cable. Press and hold the small MASKROM button in the middle of Vivid Unit's circuit board (do not release it) and then press the power button (also do not release it) for about 5 seconds. After releasing both buttons you should see the MASKROM device is detected by RKDevTool. If it doesn't show up, please repeat this step. | ||
<pic src="images/f/f8/maskrom_and_power_buttons.jpg" width="70%" align="text" caption=""></pic> | |||
Then you can specify the Loader file, which can be downloaded [https://github.com/uugear/vivid-unit-os/blob/main/boards/vivid-unit/rkbin/rk3399_loader_v1.30.130.bin here], or found in the RKDevTool package we provided on this page. The Loader's address should be set to 0x00000000. | Then you can specify the Loader file, which can be downloaded [https://github.com/uugear/vivid-unit-os/blob/main/boards/vivid-unit/rkbin/rk3399_loader_v1.30.130.bin here], or found in the RKDevTool package we provided on this page. The Loader's address should be set to 0x00000000. | ||
| Line 28: | Line 42: | ||
After connecting the power supply to your Vivid Unit, you can tap the power button to boot up the system. | After connecting the power supply to your Vivid Unit, you can tap the power button to boot up the system. | ||
=== Instructions for Mac OS X / Linux === | === Instructions for Mac OS X / Linux === | ||
| Line 51: | Line 66: | ||
You may confirm rkdeveloptool's version by: | You may confirm rkdeveloptool's version by: | ||
rkdeveloptool --version | rkdeveloptool --version | ||
Connect your Vivid Unit to your computer via an USB type-C cable. Press and hold the small MASKROM button in the middle of Vivid Unit's circuit board (do not release it) and then press the power button (also do not release it) for about 5 seconds. After releasing both buttons you should see the MASKROM device get listed with "rkdeveloptool ld" command. If it doesn't show up, please repeat this step. | Connect your Vivid Unit to your computer via an USB type-C cable. Press and hold the small MASKROM button in the middle of Vivid Unit's circuit board (do not release it) and then press the power button (also do not release it) for about 5 seconds. | ||
<pic src="images/f/f8/maskrom_and_power_buttons.jpg" width="70%" align="text" caption=""></pic> | |||
After releasing both buttons you should see the MASKROM device get listed with "rkdeveloptool ld" command. If it doesn't show up, please repeat this step. | |||
Work:~ user$ rkdeveloptool ld | Work:~ user$ rkdeveloptool ld | ||
DevNo=1 Vid=0x2207,Pid=0x330c,LocationID=1402 Maskrom | DevNo=1 Vid=0x2207,Pid=0x330c,LocationID=1402 Maskrom | ||
Latest revision as of 14:30, 3 April 2026
Remarks: this tutorial is for (re)installing Vivid Unit OS (Debian 12) into Vivid Unit device. If you want to install the old system (Debian 11), please read this page instead.
(Re)install Vivid Unit OS
Starting from April 7th, 2026, the Vivid Unit in UUGear's inventory have Vivid Unit OS (Debian 12 with XFCE desktop enviroment) pre-installed in the eMMC.
Usually you do not need to (re)install operating system by yourself. However if:
- Your Vivid Unit has old system (Debian 11) and you want new system, or
- The system on your Vivid Unit corrupts, or
- You want to install a different operating system (if available)
Then you may follow this instructions.
You may download the OS image from this page. The downloaded image is an img.xz file, and you need to extract it to get the .img file, which can be flashed into Vivid Unit.
Instructions in Windows
In order to flash the OS image into VIvid Unit, you need to put Vivid Unit into MASKROM mode, and your Windows may need extra drivers from Rockchip to recognize your Vivid Unit as a MASKROM device, so it can write data into it via USB.
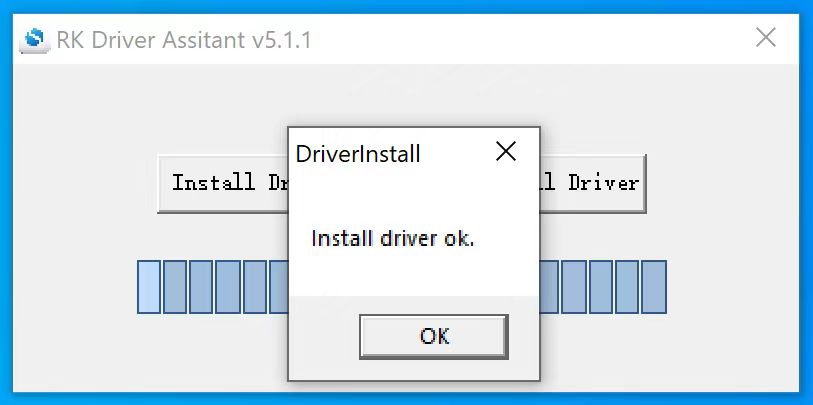
You can download and run this RK Driver Assistant to help installing the required Rockchip drivers.
You can download and run the RKDevTool to flash the OS image into your Vivid Unit.
Connect your Vivid Unit to your computer via an USB type-C cable. Press and hold the small MASKROM button in the middle of Vivid Unit's circuit board (do not release it) and then press the power button (also do not release it) for about 5 seconds. After releasing both buttons you should see the MASKROM device is detected by RKDevTool. If it doesn't show up, please repeat this step.
Then you can specify the Loader file, which can be downloaded here, or found in the RKDevTool package we provided on this page. The Loader's address should be set to 0x00000000.
You also need to specify the Image file to flash. The Image file is the .img file extracted from the .img.xz file you previously downloaded. The "Storage" of the Image should be set to "EMMC", with address 0x00000000.
Make sure to tick the checkboxes in the Loader and Image lines, as well as the "Write by Address" checkbox, as shown in the figure below. Click the "Run" button to start flashing.

Logging information will be displayed in the right region of the RKDevTool window, and it shows the progress of flashing as well. Once the flashing is done, you may disconnect your Vivid Unit from your computer.

After connecting the power supply to your Vivid Unit, you can tap the power button to boot up the system.
Instructions for Mac OS X / Linux
The RKDevTool only works in Windows, in Mac OS X or Linux, you may use its alternative rkdeveloptool instead.
In Mac OS X, you may build rkdeveloptool with Homebrew, or download here:
brew install automake autoconf libusb pkg-config git wget
git clone https://github.com/rockchip-linux/rkdeveloptool
cd rkdeveloptool
autoreconf -i
./configure
make -j $(nproc)
cp rkdeveloptool /opt/homebrew/bin/
In Linux (Debian or Ubuntu), you may build rkdeveloptool as below:
sudo apt-get update
sudo apt-get install -y libudev-dev libusb-1.0-0-dev dh-autoreconf pkg-config libusb-1.0 build-essential git wget
git clone https://github.com/rockchip-linux/rkdeveloptool
cd rkdeveloptool
autoreconf -i
./configure
make -j $(nproc)
sudo cp rkdeveloptool /usr/local/sbin/
You may confirm rkdeveloptool's version by:
rkdeveloptool --version
Connect your Vivid Unit to your computer via an USB type-C cable. Press and hold the small MASKROM button in the middle of Vivid Unit's circuit board (do not release it) and then press the power button (also do not release it) for about 5 seconds.
After releasing both buttons you should see the MASKROM device get listed with "rkdeveloptool ld" command. If it doesn't show up, please repeat this step.
Work:~ user$ rkdeveloptool ld
DevNo=1	Vid=0x2207,Pid=0x330c,LocationID=1402	Maskrom
Work:~ user$
Once you confirm Vivid Unit is detected as MASKROM device, you can load the loader and then flash the image into the device:
Work:~ user$ rkdeveloptool db rk3399_loader_v1.30.130.bin
Downloading bootloader succeeded.
Work:~ user$ rkdeveloptool wl 0x00 vuos-20260327-1.img
Write LBA from file (100%)
Work:~ user$
The Loader file can be downloaded here.
The Image file is the .img file extracted from the .img.xz file you previously downloaded. It should be flashed at address 0x00.
Once the flashing is done, you may disconnect your Vivid Unit from your computer. After connecting the power supply to your Vivid Unit, you can tap the power button to boot up the system.